“There are objects that tell a story.”
While browsing a flea market, I came across a wooden baby crib dating from 1901.
I couldn’t resist giving it a second life. This renovation project was born out of a passion, a desire to preserve the artisanal heritage while making it safe for baby.
In this article, I share with you the steps involved in restoring this antique crib: from sanding the wood to applying varnish, including the choice of finishes and little tips to respect the object’s soul.
A project that was both technical and rewarding.
Renovation: step by step
1) Preparation of the support
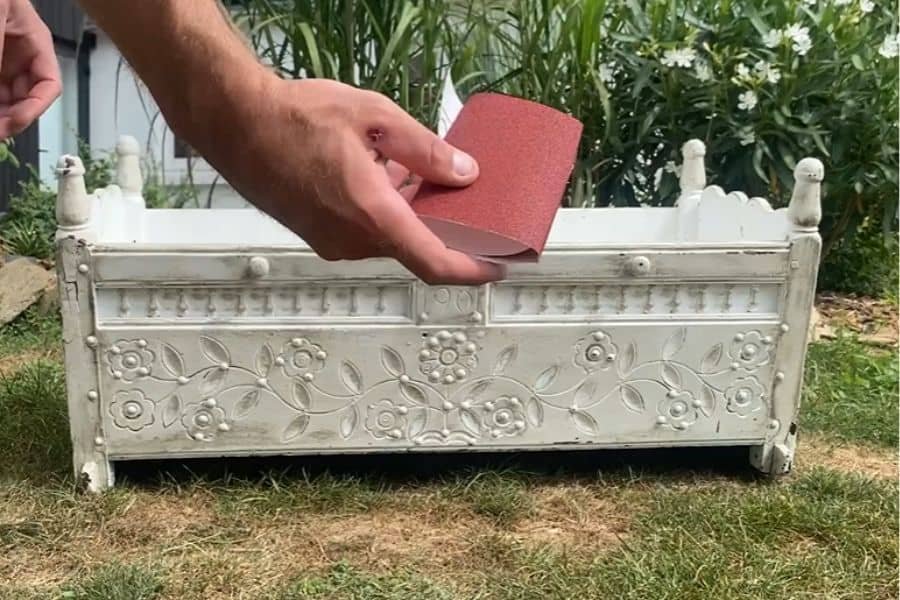
Before repainting an old crib, proper preparation is essential to ensure a lasting result that’s safe for your baby.
Start by thoroughly cleaning the crib to remove any dust, dirt, or sticky residue. Next, sand the wood with fine-grit sandpaper (180 grit) to remove the old paint or varnish. This sanding step is essential, especially if the crib was previously coated with toxic paint, such as Glycero.
Once sanding is complete, carefully dust off the paint with a damp cloth (using Marseille soap, for example).
2) Repair
3) Paint
No Results Found
The page you requested could not be found. Try refining your search, or use the navigation above to locate the post.
“Non-toxic paint to ensure baby’s safety”
Once the crib’s wood is properly prepared, comes the painting step—a rewarding moment! This must be done with care, given that it’s an antique piece of furniture.
It’s essential to choose paint suitable for baby furniture: it must be solvent-free, free of VOCs (volatile organic compounds), and certified non-toxic to ensure your baby’s safety. Apply the paint in thin coats using a soft brush or a small foam roller to avoid drips and ensure an even finish, especially on rounded surfaces and bars.
Let each coat dry thoroughly (usually 6 to 12 hours, depending on the manufacturer’s instructions), and allow two to three coats to fully cover the wood. On an antique crib, it’s also a good idea to leave the wood grain visible to preserve its charm.

Note: tannic woods
4) A unique touch with gold leaf
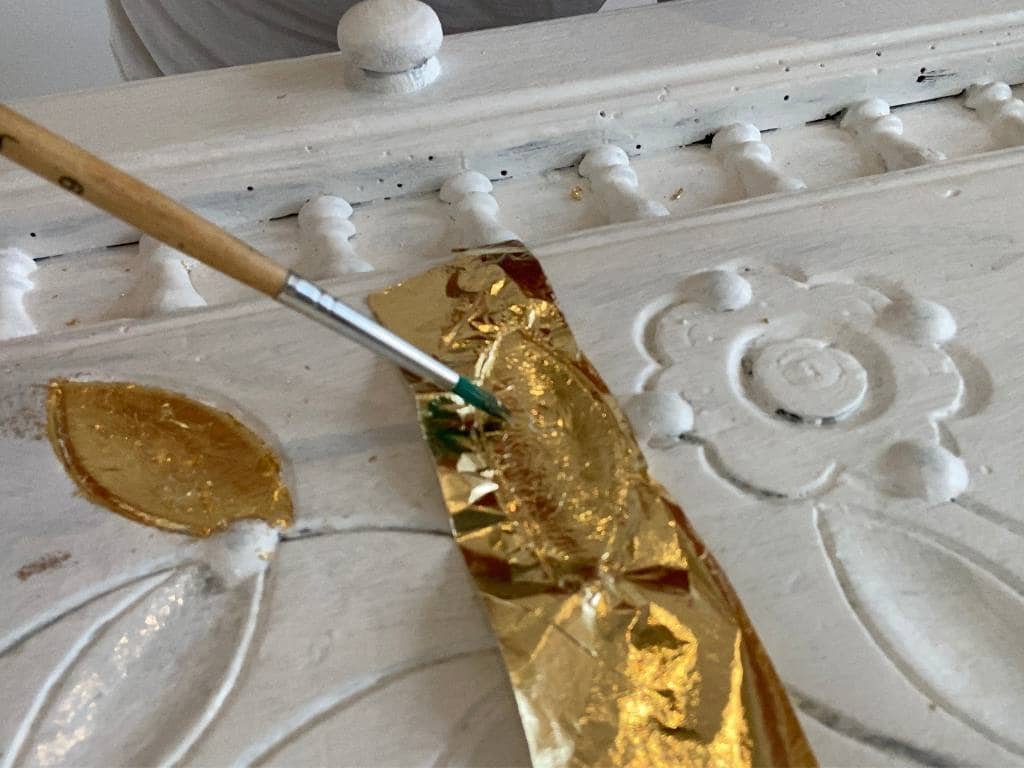
When it comes to renovating your crib, you might as well let your imagination run wild and treat yourself!
In my case, I wanted to highlight the floral motifs carved into the wood.
I chose to apply gold leaf to enhance the wood decorations and highlight the crib’s classic style.
Applying gold leaf is delicate work, but very rewarding when you see the final result.
5) Varnish
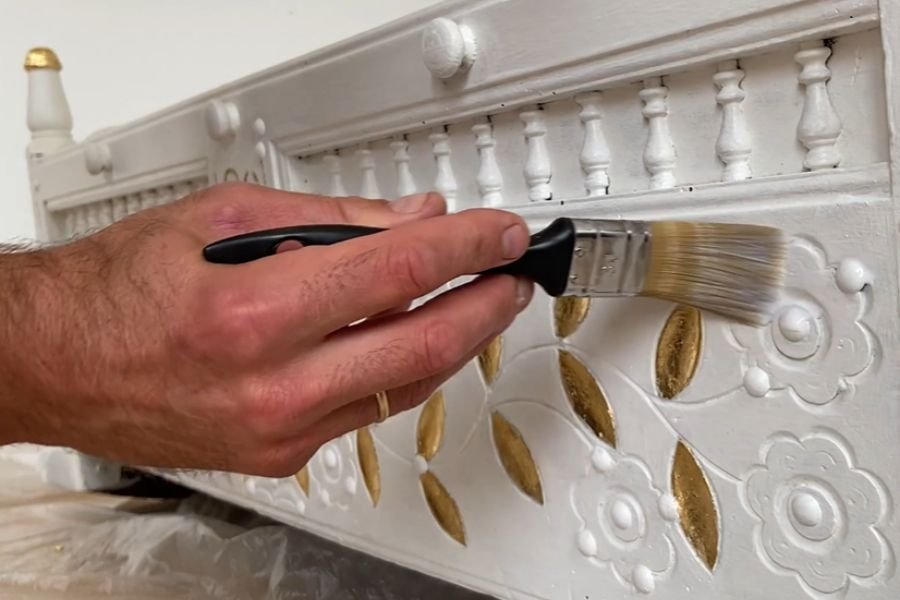
Once the crib’s surface is painted and decorated, a child-friendly varnish should be applied, ideally solvent-free and free of VOCs (volatile organic compounds).
We recommend toy-grade varnish. This type of varnish is formulated to be non-toxic, even if it comes into contact with the mouth. It is generally applied in two thin coats, with a light sanding between each coat to ensure a smooth and durable finish. Varnishing protects the wood from moisture, stains, and daily wear, while also making it easier to maintain.
The crib should be allowed to dry completely for several days (according to the manufacturer’s recommendations) before returning it to use, to ensure all fumes have dissipated.
Conclusion
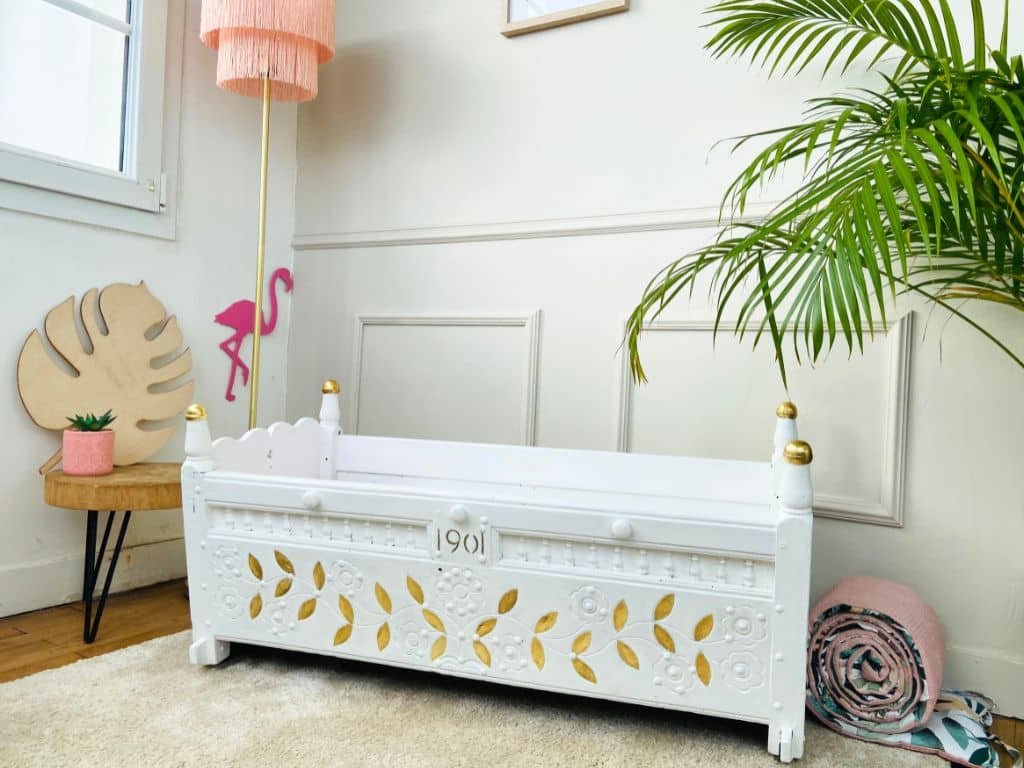
“Ultimately, it’s about giving your baby a start in life surrounded by beauty, memory and love.”
Renovating an antique crib is a meaningful endeavor, combining respect for the past with attention to the well-being of the child to come. By revitalizing a unique piece, often inherited or full of memories, you create a cozy, durable, and personalized haven.
Each step requires care and patience, especially when it comes to ensuring the safety and non-toxicity of the materials used.


